
Easter Egg Chocolate Chip Cookie Cups Perfect for Spring Parties
Spring baking always feels a little extra special to me. Maybe it’s the soft pastel colors, the excitement of Easter gatherings, or simply the fact that desserts this time of year look so cheerful and fun. Whenever I’m planning a spring dessert table, there’s one recipe I come back to again and again: these adorable Easter Egg Chocolate Chip Cookie Cups. They’re festive, incredibly easy to make, and honestly one of the cutest treats you can serve at an Easter party.
When I think about the perfect Easter dessert, I picture something colorful, comforting, and easy for everyone to grab and enjoy. That’s exactly why I love these cookie cups so much. They combine the classic flavour of soft chocolate chip cookies with crunchy candy coated Easter eggs, all baked into perfectly portioned little cups that look bakery worthy without requiring complicated decorating skills.
Whether you’re hosting an Easter brunch, planning a spring baby shower, making treats for your kids, or simply looking for a fun weekend baking project, these cookie cups always deliver. Every time I make them, they disappear from the dessert table within minutes. And honestly, I completely understand why.
Why These Easter Cookie Cups Are Always a Hit
Some desserts taste amazing but don’t look very exciting. Others look beautiful but take hours of work. These Easter Egg Chocolate Chip Cookie Cups give you the best of both worlds.
They’re:
- Soft and chewy in the center
- Slightly crisp around the edges
- Packed with melty chocolate chips
- Topped with colorful Easter candies
- Easy to transport and serve
- Perfect for parties and gatherings
I also love how versatile they are. You can keep them simple for casual family desserts or dress them up beautifully for special celebrations. Either way, they always feel festive and homemade in the best possible way.
Ingredients You’ll Need
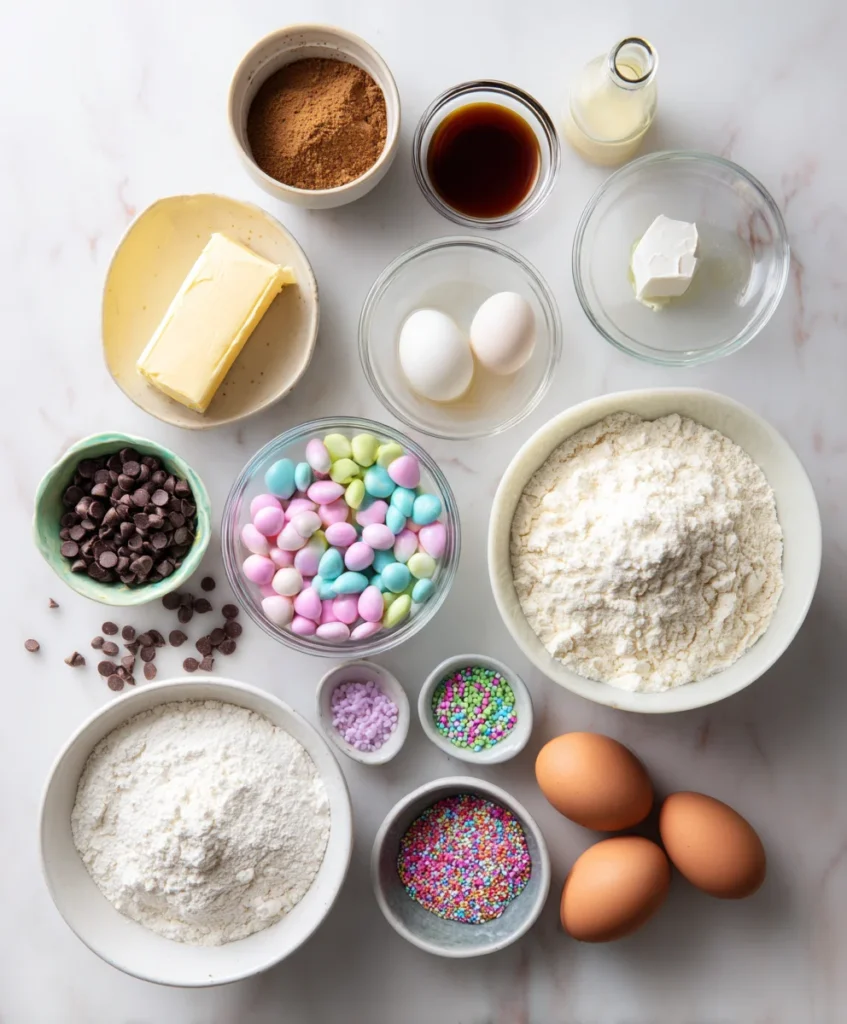
One of the reasons I make this recipe so often is because the ingredients are simple and easy to find. Most of them are probably already sitting in your kitchen.
For the Cookie Dough
- 1 cup unsalted butter, softened
- 1 cup brown sugar
- ½ cup granulated sugar
- 2 large eggs
- 2 teaspoons vanilla extract
- 2½ cups all purpose flour
- 1 teaspoon baking soda
- ½ teaspoon salt
- 1½ cups chocolate chips
For the Easter Topping
- Mini chocolate Easter eggs
- Extra chocolate chips (optional)
- Spring sprinkles (optional)
The pastel candy eggs are really what make these cookie cups stand out. They instantly turn a classic chocolate chip cookie into something festive and perfect for spring celebrations.
How to Make Easter Egg Chocolate Chip Cookie Cups
The process is surprisingly simple, which is one of the reasons I recommend this recipe even for beginner bakers.
Step 1: Prepare Your Muffin Pan
Start by preheating your oven to 350°F.Lightly grease a mini muffin pan with butter or nonstick spray. This step matters more than people think because cookie cups can stick easily if the pan isn’t prepared properly.I usually use a mini muffin pan because the smaller size makes these perfect for dessert platters and party trays.
Step 2: Make the Cookie Dough
In a large mixing bowl, cream together the softened butter, brown sugar, and granulated sugar until the mixture becomes light and fluffy.This step helps create that soft bakery style texture everyone loves.Next, add the eggs and vanilla extract. Mix until everything is smooth and fully combined.In a separate bowl, whisk together the flour, baking soda, and salt.
Slowly add the dry ingredients into the wet ingredients while mixing gently.Finally, fold in the chocolate chips.At this point, the dough should look thick, soft, and incredibly tempting.
Step 3: Fill the Muffin Pan
Using a small cookie scoop or spoon, fill each muffin cavity about three quarters full with cookie dough.Try not to overfill them because the dough expands while baking.I usually press the tops down slightly with the back of a spoon to help them bake evenly.
Step 4: Bake Until Golden
Bake the cookie cups for about 10 to 12 minutes, or until the edges become lightly golden brown.The centers may still look slightly soft when you remove them from the oven, and that’s completely normal. They continue setting while cooling.One thing I’ve learned over time is that slightly underbaked cookie cups always taste better than overbaked ones.
Step 5: Add the Easter Eggs
As soon as the cookie cups come out of the oven, gently press mini Easter eggs into the tops.This is honestly my favorite part because the colorful candies instantly make the whole tray look bright, cheerful, and spring ready.You can press one large egg into the center or several smaller candies on top depending on the look you want.Let the cookie cups cool in the pan for about 10 minutes before transferring them to a wire rack.
The Best Easter Candies to Use
I’ve experimented with several different candies over the years, and honestly, most of them work beautifully. My personal favourite is Cadbury style mini eggs because they add a delicious crunchy shell with creamy chocolate inside.
Here are some great options:
- Candy coated mini eggs
- Peanut butter Easter candies
- Chocolate caramel eggs
- Pastel M&M candies
- White chocolate Easter eggs
If the candies are larger, I usually chop a few in half so they fit more neatly on top of the cookie cups.
What Makes Cookie Cups Different From Regular Cookies?
If you’ve never made cookie cups before, they’re basically cookies baked inside a muffin pan instead of on a flat baking sheet. This gives them a thicker, softer texture with slightly crispy edges and a perfectly chewy center.
The muffin tin also helps the cookies hold their shape beautifully, which makes them ideal for toppings like mini Easter eggs, chocolate candies, sprinkles, or even frosting.What I personally love most is that they feel a little more special than regular cookies without requiring any advanced baking techniques.
Tips for Perfect Cookie Cups Every Time
Over the years, I’ve picked up a few simple tricks that make a huge difference with this recipe.
Use Room Temperature Ingredients
Soft butter and room temperature eggs blend much more smoothly into the dough, creating better texture and even baking.Cold ingredients can make the dough harder to mix properly.
Don’t Overmix the Dough
Once you add the flour, mix only until combined.Overmixing can create dense cookie cups instead of soft, chewy ones.
Slightly Underbake Them
This is probably the most important tip.Cookie cups continue baking from residual heat after they leave the oven, so pulling them out while the centers still look slightly soft helps keep them chewy.
Add Candies Immediately
The Easter eggs stick best when the cookies are still warm.If you wait too long, the tops firm up and the candies won’t settle nicely into the cookie cups.
Fun Variations to Try

One thing I love about this recipe is how customizable it is. You can easily switch things up depending on your mood or the occasion.
Double Chocolate Version
Replace some of the flour with cocoa powder for rich chocolate cookie cups.
Peanut Butter Lovers Version
Add peanut butter chips to the dough for extra flavor.
Coconut Nest Cookie Cups
Sprinkle toasted coconut around the Easter eggs to create little edible nests.
White Chocolate Spring Cookie Cups
Swap regular chocolate chips for white chocolate chips for a sweeter spring inspired flavour.
Why These Are Perfect for Spring Parties
Whenever I’m planning desserts for Easter or spring events, I always look for recipes that are easy to serve and easy to transport. These cookie cups check both boxes perfectly.
They work beautifully for:
- Easter brunches
- Spring birthdays
- School parties
- Baby showers
- Church gatherings
- Family dinners
- Dessert tables
- Bake sales
Because they’re individually portioned, guests can simply grab one and enjoy without needing plates or utensils.
And honestly, desserts that are both cute and convenient are always a win in my book.
Final Thoughts
There’s something so joyful about simple homemade desserts that bring people together, and these Easter Egg Chocolate Chip Cookie Cups do exactly that. They’re colorful, comforting, festive, and incredibly easy to make, which is honestly my favorite kind of recipe.
I love that they feel special enough for holiday celebrations while still being simple enough to bake on an ordinary afternoon. The soft cookie texture, melted chocolate, and crunchy Easter candies create the perfect combination in every bite.
And if you ask me, desserts like this are what spring baking is all about fun, cheerful treats made to share with the people you love most.
Frequently Asked Questions

Easter Egg Chocolate Chip Cookie Cups Perfect for Spring Parties
These Easter Egg Chocolate Chip Cookie Cups are soft, chewy, and filled with melty chocolate in every bite. Topped with colorful mini Easter eggs, they’re the perfect festive dessert for spring parties, Easter brunch, and family gatherings.
Ingredients
1 cup unsalted butter, softened
1 cup brown sugar
½ cup granulated sugar
2 large eggs
2 teaspoons vanilla extract
2½ cups all purpose flour
1 teaspoon baking soda
½ teaspoon salt
1½ cups chocolate chips
Mini chocolate Easter eggs for topping
Directions
- Preheat oven to 350°F and grease a mini muffin pan.
- Cream butter, brown sugar, and granulated sugar until fluffy.
- Add eggs and vanilla extract, then mix until smooth.
- In another bowl, whisk flour, baking soda, and salt.
- Gradually combine dry ingredients with wet ingredients.
- Fold in chocolate chips.
- Scoop dough into muffin cavities, filling about ¾ full.
- Bake for 10 to 12 minutes until edges are lightly golden.
- Press mini Easter eggs into warm cookie cups immediately after baking.
- Cool for 10 minutes before removing from the pan and serving.
Recipe Video
Notes
- Don’t overbake the cookie cups slightly soft centers give the best chewy texture.
Press the Easter eggs into the cookie cups immediately after baking while they’re still warm.
Grease the muffin pan well to prevent sticking and create crisp golden edges.